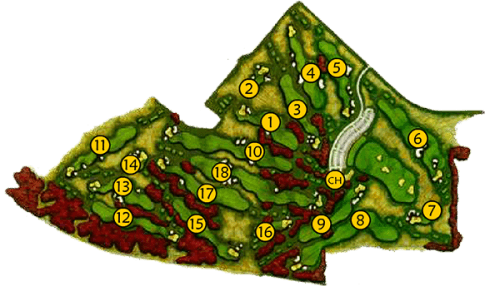
Vicar
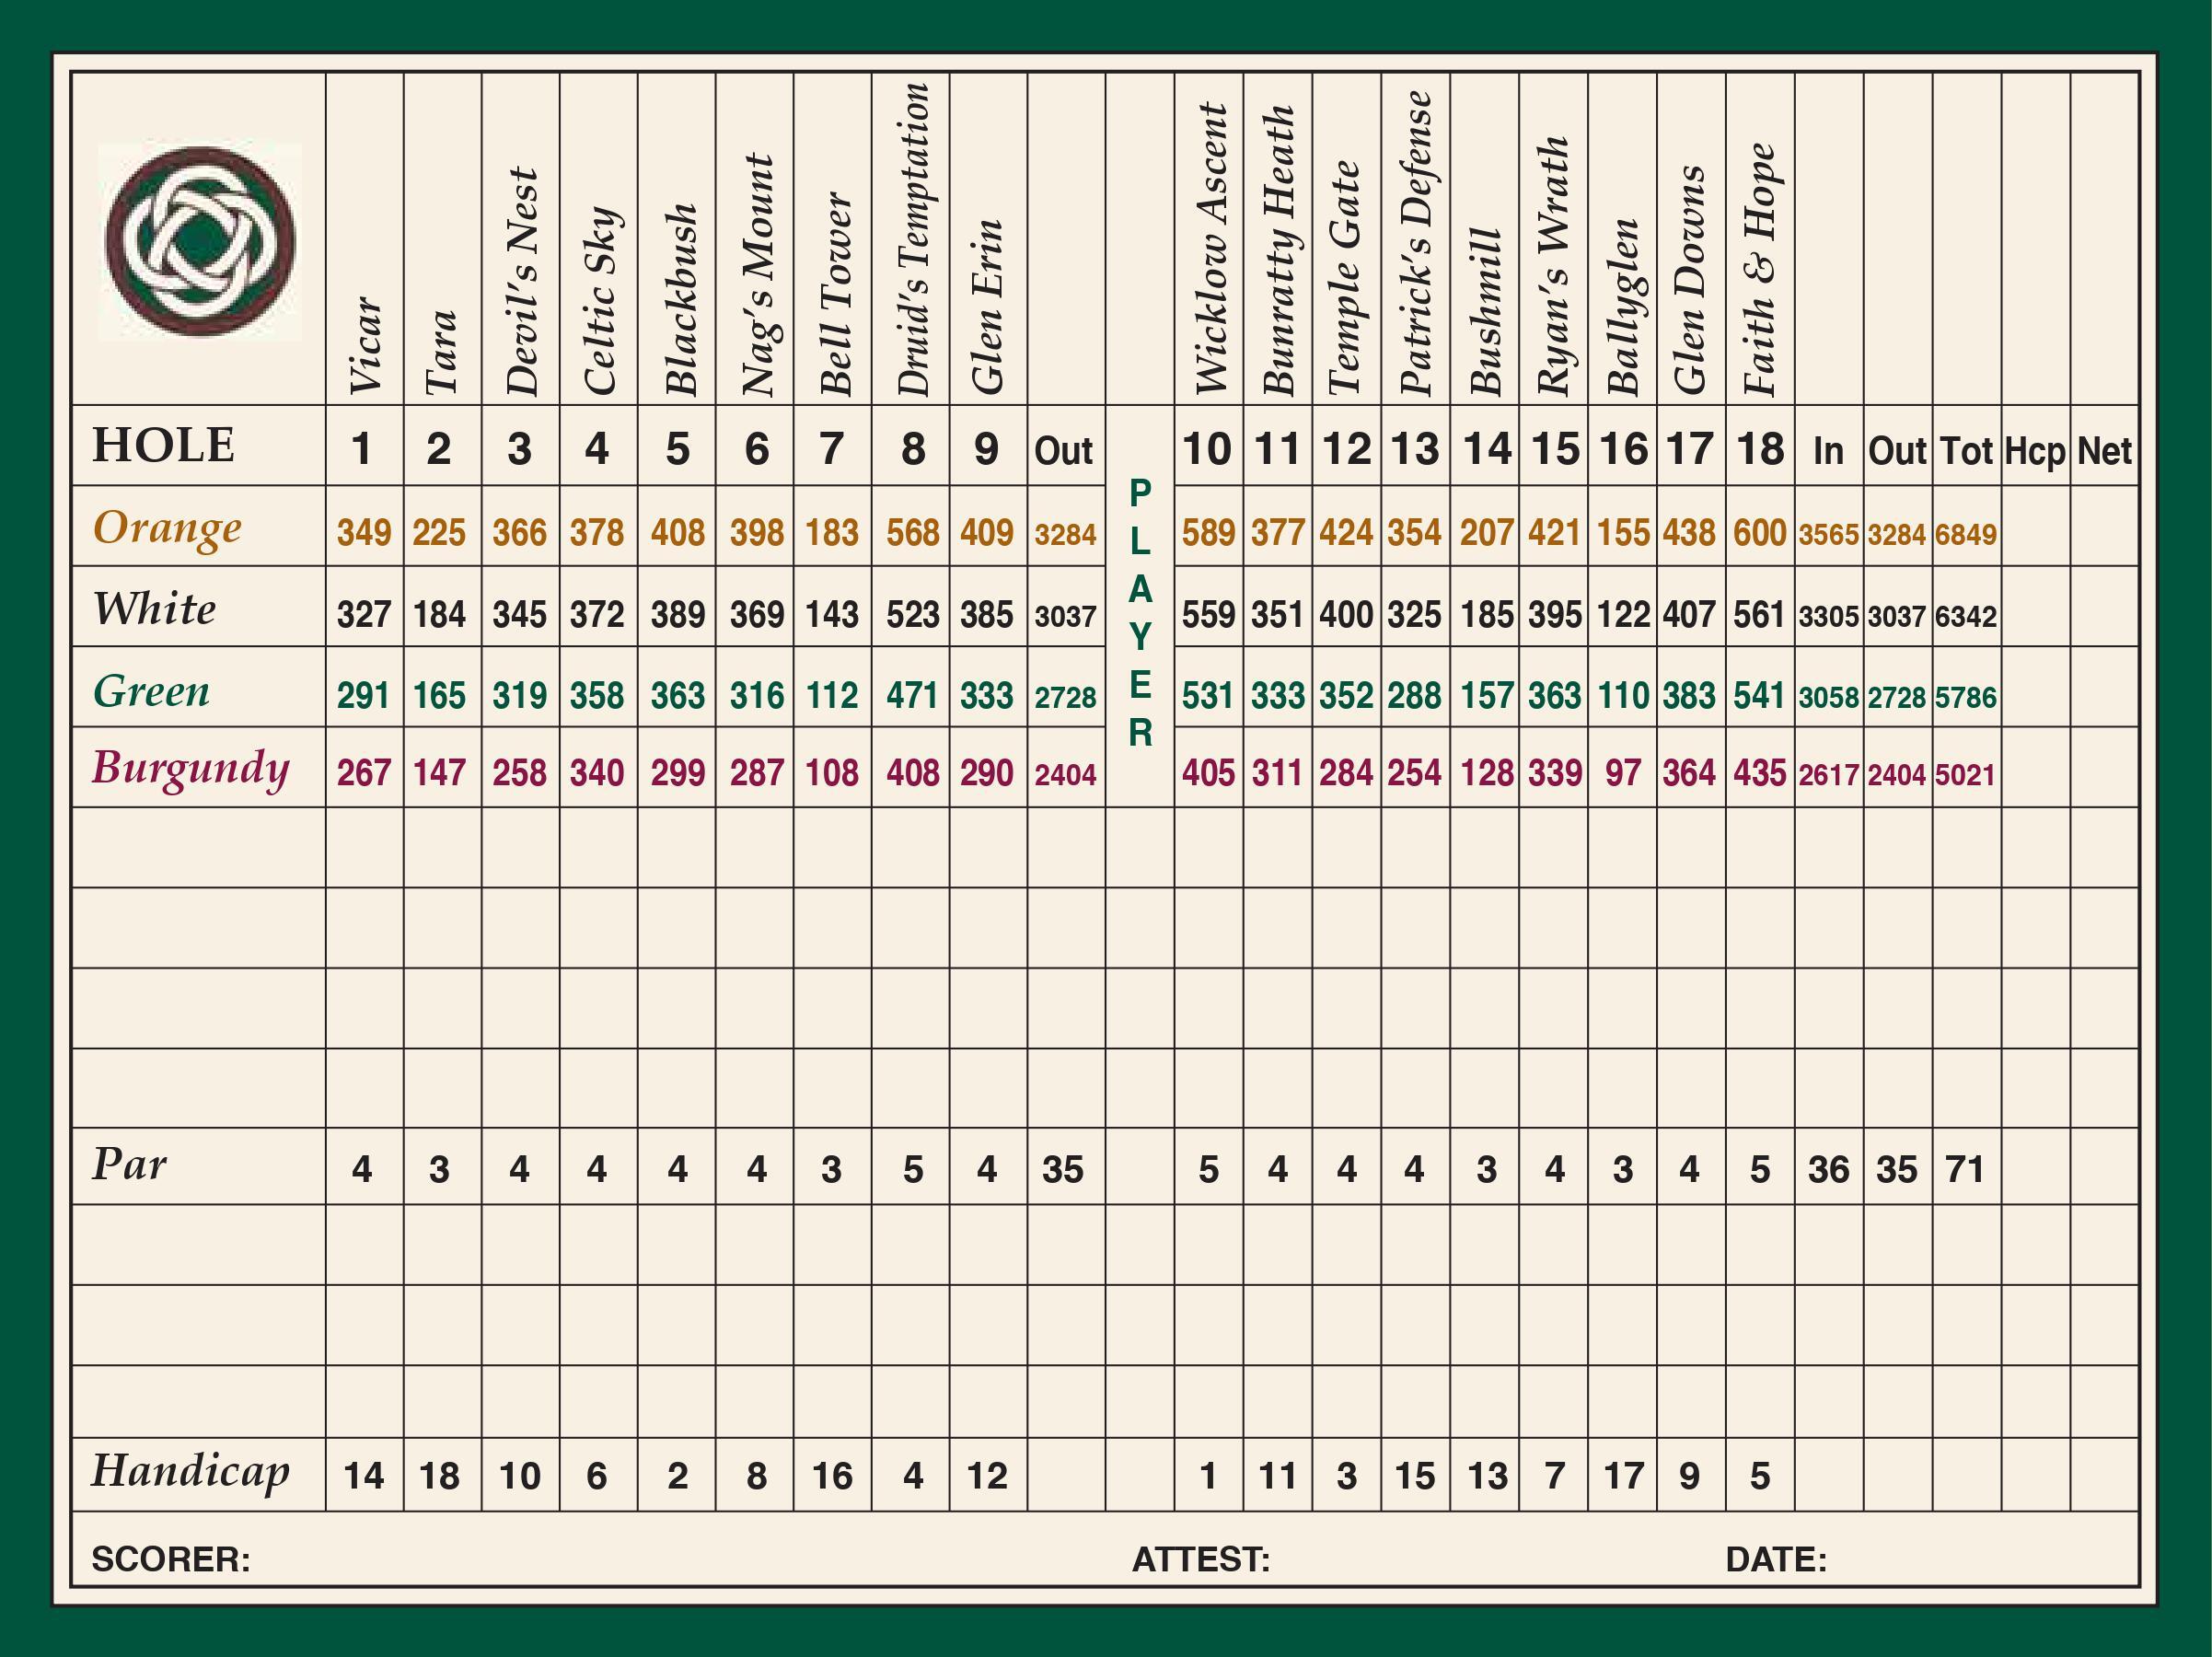
Par 4
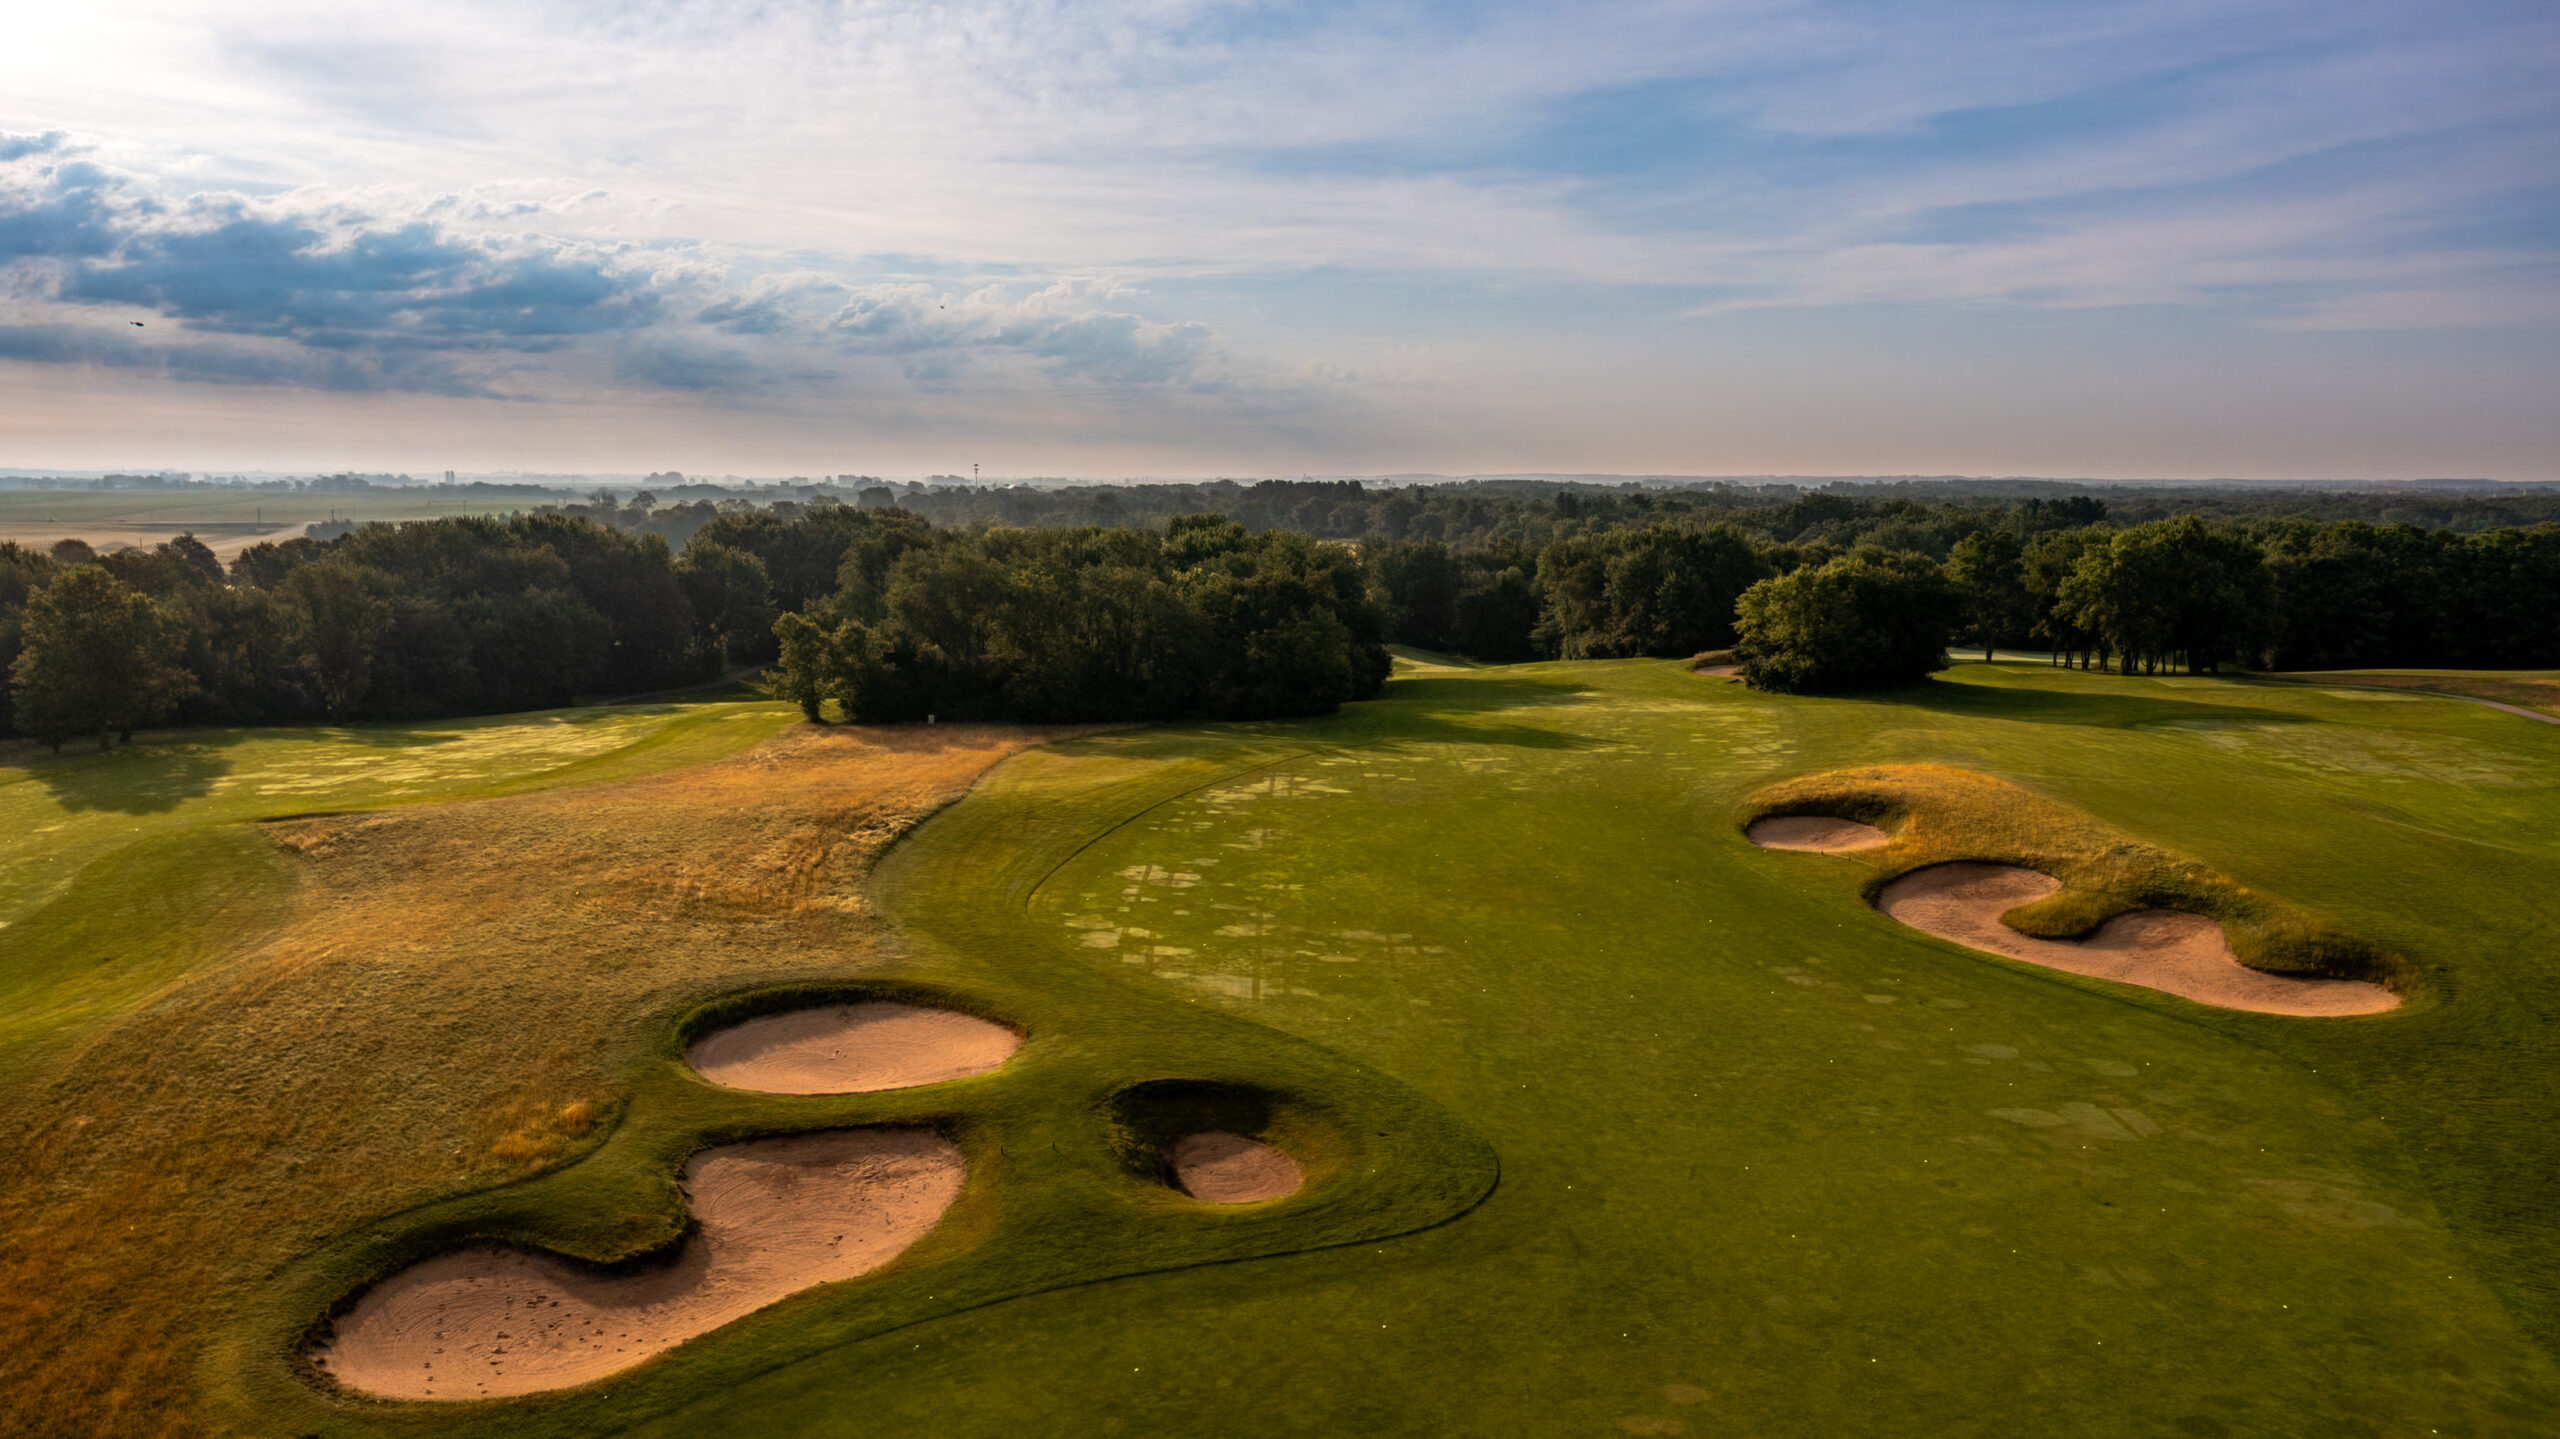
An uphill hole, this medium-length starting hole is a good warm-up. Seemingly simple, the tee shot plays into a gentle valley. However, the deep greenside bunker imposes itself on the approach. The better angle to the green means flirting with the fairway bunker. The green falls from back left to front right.
Tara
Par 3
A medium par 3 that looks longer than it plays. Playing with the predominant wind, this hole will change depending on pin position and weather. Keep the ball below the hole for the best opportunity to make a putt.
Devil’s Nest
Par 4
The spirited may want to “let ‘er rip”, but the more cautious and thoughtful golfer will want to position the ball approximately 220 yards along the left edge of the fairway for the best approach to this demanding green. A nest of “nasty” greenside pot bunkers will catch many an errant shot to this small, inviting green. Take a par and move along.
Celtic Sky
Par 4
Stretched across the landscape, this hole is simultaneously inviting and daunting. The tee shot must navigate four fairway bunkers. Even the best of tee shots may leave a semi-blind approach to this “low-profile” and undulating green. A good strategy may be a bump-and-run shot to this novel green setting, characteristic of the Irish links.
Blackbush
Par 4
A conspicuous dogleg right, this hole begs for a left-to-right shot. However, if overplayed, the ball will find an early grave. The fairway and green ascend from the valley floor and lie in wait precariously along the edge of the ridge. A pin tucked in the back right is intimidating. Best to lay up to the middle of the green here.
Nag’s Mount
Par 4
This launching pad provides a wonderful view of the entire front nine. A good play is to the bottom of the hill, immediately in front of the fairway “cross-bunkers.” A soft touch to this well-guarded green is required to get it close. This gently crowned green will repel poorly executed shots.
Bell Tower
Par 3
On top of the world, this uphill par 3 will have you playing back into the wind. Take comfort and an extra club… Leaving it short will prove disastrous. For the less bold, play it left to a bailout area. A pin in the back right will hang dangerously close to misery.
Druid’s Temptation
Par 5
A short hole; this will not be easily attacked. A receptive shot gives rise to a compelling approach to this intimate green setting. Second shot placement will be the key to success on this meandering par 5. The green is severely sloped from front right to the back left, so the angle of approach should favor the left side of the fairway.
Glen Erin
Par 4
From the glen, this soft uphill par 4 is a strong two-shot hole playing around the hillside. A semi-blind approach shot will require trust. The green is settled into the hill, favoring a left-to-right approach with deep bunkers guarding the right side of the green.
Wicklow Ascent
Par 5
The start of the back nine is an intimidating uphill tee shot to crest overlooking the back nine holes. The green is unreachable on the second shot, so second-shot placement and angles should be considered. This green features two bunkers in front and back left, as well as a deep swale behind the green ready to catch aggressive play. The green is crowned, and approach shots may roll through if care is not taken.
Bunratty Heath
Par 4
A shortish par 4; this hole is at the mercy of the elements. Prevailing winds and a deceptive duo of bunkers will wreak havoc on the unwitting.
Temple Gate
Par 4
This is a demanding par 4 playing deep into the woodland. A tee shot must bisect oaks that stand sentinel along the edges of the wide but menacing landing area. The second shot must soar over a valley to a green fortified by two majestic hardwood trees.
Patrick’s Defense
Par 4
Playing back out of the woodlands, this hole has two personalities. The tee shot must play from a canyon of oaks to an opening guarded by fairway bunkers. The approach shot will play to a green characterized by links-free features, including a deep native waste bunker, a greenside chipping area, and a swale bisecting the green.
Bushmill
Par 3
The first of two strong par 3s on the back nine, this hole will require a steady stroke playing across and along a deep waste bunker to a large, serpentine green. Depending upon pin location, club choice may vary by two or more. Playing away from the bunkers will find an unpleasant result, as the grade pitches quickly from the green.
Ryan’s Wrath
Par 4
Options are available on this medium-length par 4. A driver may be warranted, or maybe a two-iron to the base of the hill. Regardless, an uphill shot is required to an elevated green with a variety of pin locations possible. Bunkers protect the left, and a steep fairway incline protects the right. Missing to the right could be ruinous.
Ballyglen
Par 3
This is another bedeviling golf hole. A beautiful but deadly short par 3 will impart a few birdies, some pars, and even more bogeys. Club selection will be determined by wind conditions and pin position. Don’t be long! This is a huge green, so play steady.
Glen Downs
Par 4
Length off the tee will be favored on this long par 4, as a big shot will roll to the base of the hill. However, a solid long-iron approach is still necessary to reach this perched and well-protected green.
Faith & Hope
Par 5
This is a grand and befitting finish. A long par five must be played with cautious aggression. A well-placed tee shot encourages a second shot to the top of the hillside, and then a shot with a mid-iron to a shallow, well-guarded green sited at the base of the clubhouse. This two-tiered green requires play to the proper section for a chance at a birdie.
I’m very proud of Glen Erin. It has a simple beauty to it that resonates beyond golf-specific issues. This is a project that again illustrates my commitment to fun, enjoyable golf for a reasonable expense.
— Greg Martin, Golf Course Architect